Create a Simple JavaScript Quiz App Using HTML, CSS, and JavaScript
This article dives deep into the world of creating a simple JavaScript quiz, leveraging the power of HTML elements and CSS styles. Whether you're a budding web developer or someone looking to add interactive elements to your website, this guide is worth your time. Let me show you how I used this simple, but fun method to learn JavaScript!
If you read my article, How to Run JavaScript in Visual Studio Code, then you should have the prerequisites to start building this small app. If not, I encourage you to read that first to get set up. I recommend you install the Live Server extension to preview your app.
Now, quizzes have always been a fun way to test knowledge. With the power of JavaScript, creating interactive quizzes for web platforms has become more accessible than ever. This tutorial will guide you through the process of making a basic quiz app using JavaScript, ensuring a seamless user experience.
When building a basic app, your HTML structure is very important. Knowing where the elements exist in the hierarchy is important especially down the line when you need to start thinking about accessing those child elements.
For our basic needs in this app, we just need a UI that displays the question and a few options for answers. To start, type '!' and let the intellisense bring up the preset HTML template. Hit enter on it and add a few tags to have the application look like this:
<!-- index.html -->

<!DOCTYPE html>
<html lang="en">
<head>
  <meta charset="UTF-8">
  <meta name="viewport" content="width=device-width, initial-scale=1.0">
  <title>My Quiz App</title>
</head>
<body>
  <main>
    <div class="container">
      <h1 id="title">My Quiz App</h1>
      <h2 id="question">Question?</h2>
      <div id="answer-container">
        <button id="answer1">Answer 1</button>
        <button id="answer2">Answer 2</button>
        <button id="answer3">Answer 3</button>
        <button id="answer4">Answer 4</button>
      </div>
      <h2 id="result"></h2>
      <div class="button-container">
        <button id="retry">Retry</button>
        <button id="next">Next Question</button>
      </div>
    </div>
  </main>
</body>
</html>
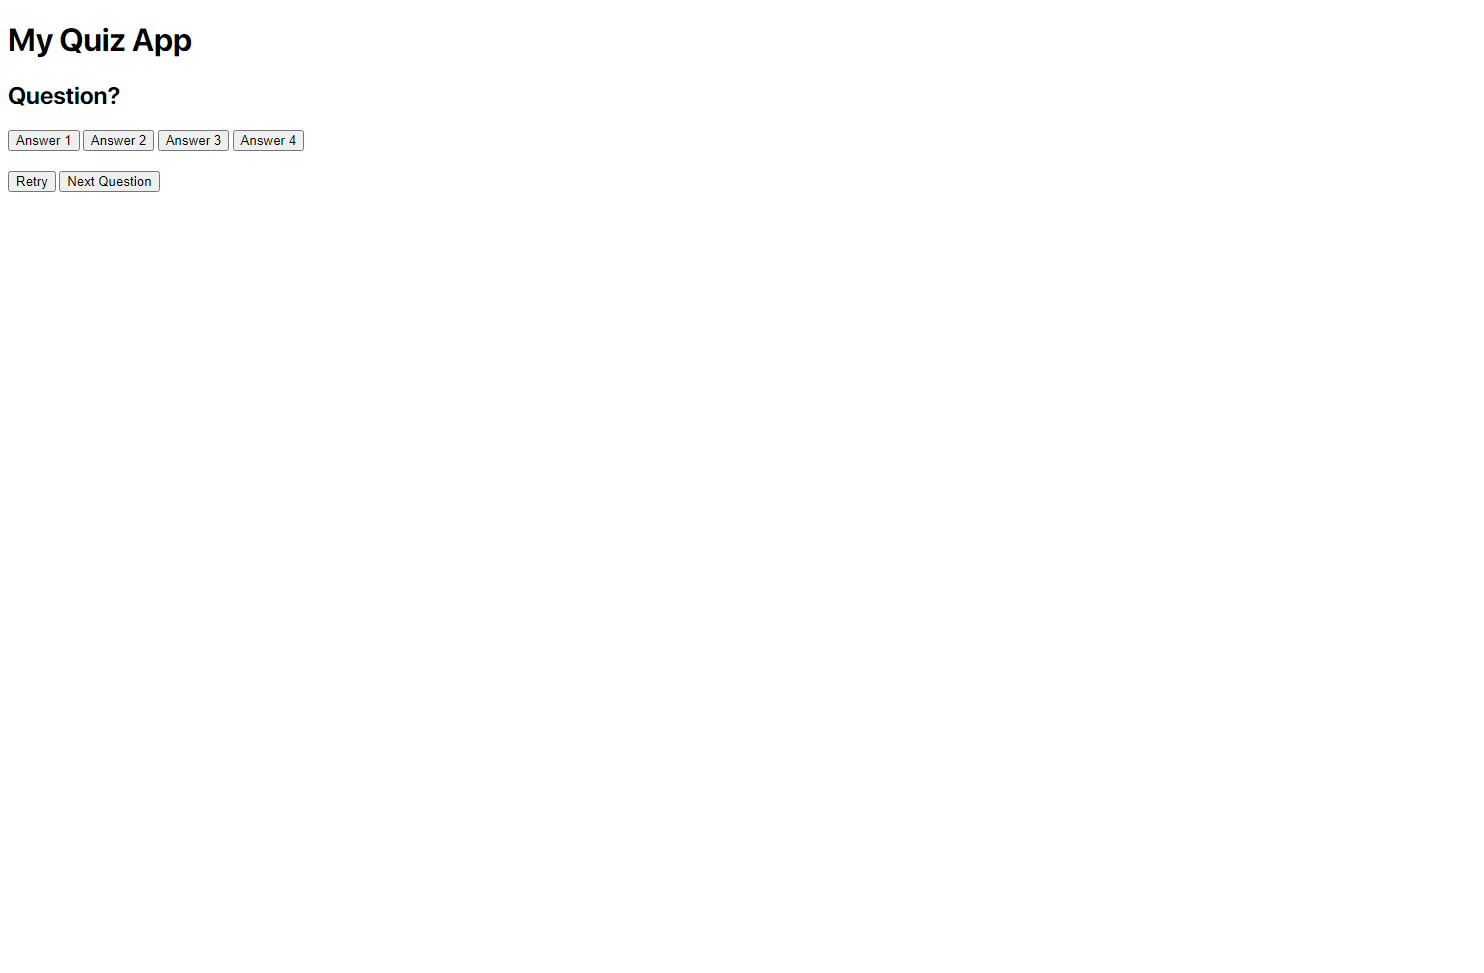
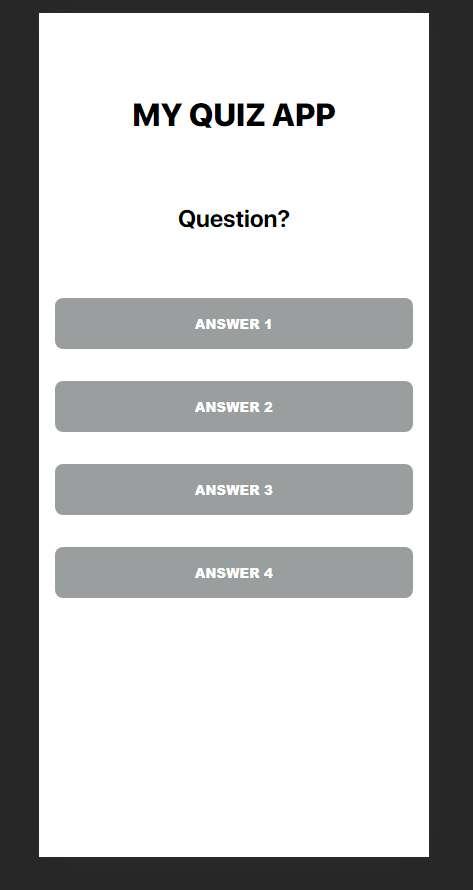
Now with the Live Server extension, you can preview this app by right-clicking and selecting Open with Live Server, or clicking the Go Live button on the bottom right of VS Code.
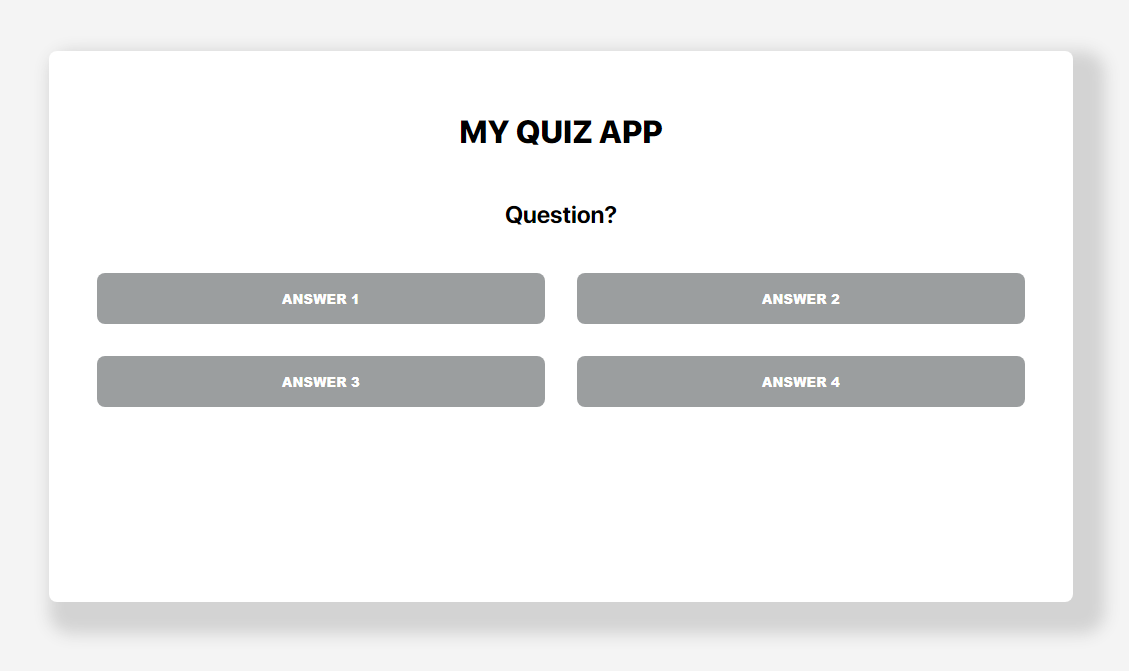
You should have something that looks like this:
Making your applications look good is essential for users to enjoy their experience with what you created. Now, I'm no web designer, but we can add some basic CSS to make this look decent enough. Add a link in your HTML header to a stylesheet that will be called index.css.
<!-- index.html -->

<head>
  <!-- other header tags -->
  <link rel="stylesheet" href="./index.css">
  <!--   other header tags -->
<head>
Let's start by centering all our elements:
html, body {
  margin: 0;
  padding: 0;
  background-color: #f4f4f4;
}


main {
  margin: auto;
  display: flex;
  flex-direction: column;
  justify-content: center;
  align-items: center;
  text-align: center;
  height: 100vh;
}
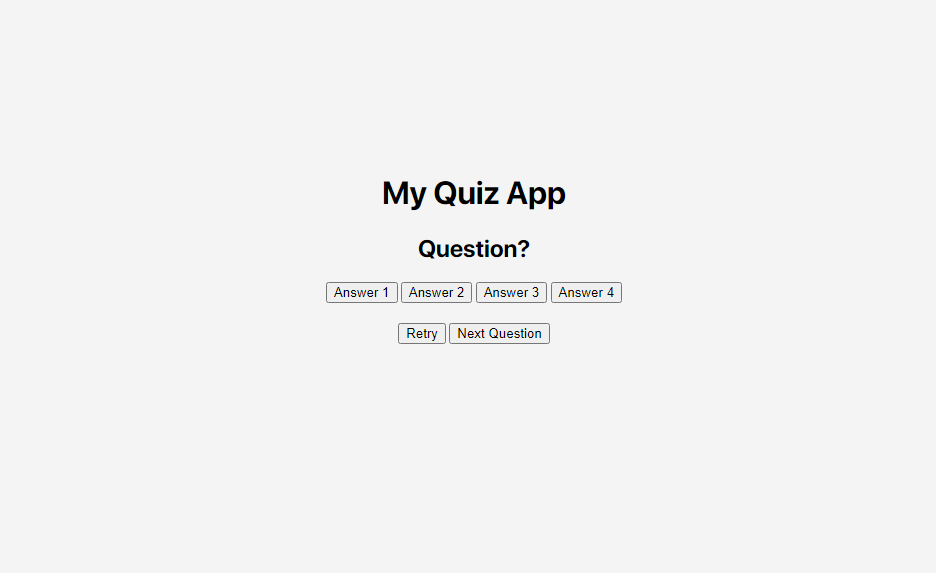
It should look something like this:
Now let's make the div containing all the elements look a little better.
/* index.css */

.container {
  display: flex;
  flex-direction: column;
  justify-content: space-evenly;
  height: 50vh;
  padding: 2rem;
  width: 50%;
  border-radius: 0.5rem;
  box-shadow: 1rem 1rem 1rem 1rem lightgray;
  background-color: #fff;
}


.button-container {
  display: flex;
  flex-direction: row;
  justify-content: center;
}


#title {
  font-size: xx-large;
  font-weight: 800;
  text-transform: uppercase;
}


#answer-container {
  display: grid;
  grid-template-columns: auto auto;
  align-content: space-evenly;
}


button {
  font-weight: 800;
  text-transform: uppercase;
  border: none;
  border-radius: 0.5rem;
  margin: 1rem;
  padding: 1rem;
  background-color: #9b9e9f;
  color: white;
}


button:hover {
  background-color: #24a0ed;
}


button:disabled {
  background-color: #9b9e9f;
}
Preview:
Some things to note that were added are the hover effects to help users know which one they are selecting. Also, having the elements spaced properly gives it a better feel for the user.
We will add some UX design choices by making our Retry and Next Question buttons invisible until the user answers the question. This will be done programmatically, but we can set the defaults using our CSS.
/* index.css */

#next, #retry, #result {
  visibility: hidden;
}
Now that our app looks decent enough, let's start adding some functionality to it.
For this example, we'll start by storing our questions in an array in the beginning for testing purposes. We will eventually change that, but in the meantime follow this example:
// index.js
let currentQuestion = 0; // The index of the question we will display
const questions = [

{
      "question": "What does \"HTML\" stand for?",
      "options": [
          "Hyper Text Markup Language",
          "High Technology Modern Language",
          "Hyperlinking Text Management Language",
          "High Tech Media Language"
      ],
      "correctAnswer": 0
  },
  {
      "question": "Which of these is not a Linux distribution?",
      "options": [
          "Ubuntu",
          "Fedora",
          "Solaris",
          "Debian"
      ],
      "correctAnswer": 2
  },
  {
      "question": "Who is known as the father of the computer?",
      "options": [
          "Alan Turing",
          "Steve Jobs",
          "Charles Babbage",
          "Bill Gates"
      ],
      "correctAnswer": 2
  },

];
We will eventually move these questions in to a separate file for better practice.
The Document Object Model (DOM) is crucial in making our JavaScript quiz interactive. By manipulating DOM elements, we can dynamically show questions, capture user input and display results. You won't need to know everthing about the DOM, but I suggest you at least understand the basics and how JavaScript works with it.
Using JavaScript and the DOM, we can present questions to the user seamlessly. We will start by loading the questions on the page's first render by calling our loadQuestions function.
let currentQuestion = 0;
const questions = [/** your questions and answers */];

function loadQuestions() {
  const question = document.getElementById("question");
  question.innerHTML = questions[currentQuestion].question;

  for(let i = 1; i <= 4; i++) {
    const btn = document.getElementById("answer" + i);
    btn.innerHTML = questions[currentQuestion].options[i - 1];
  }
}

loadQuestions();
Our function targets the question and answers element in our DOM by the id then programatically loads the question and answers from the array to the page.
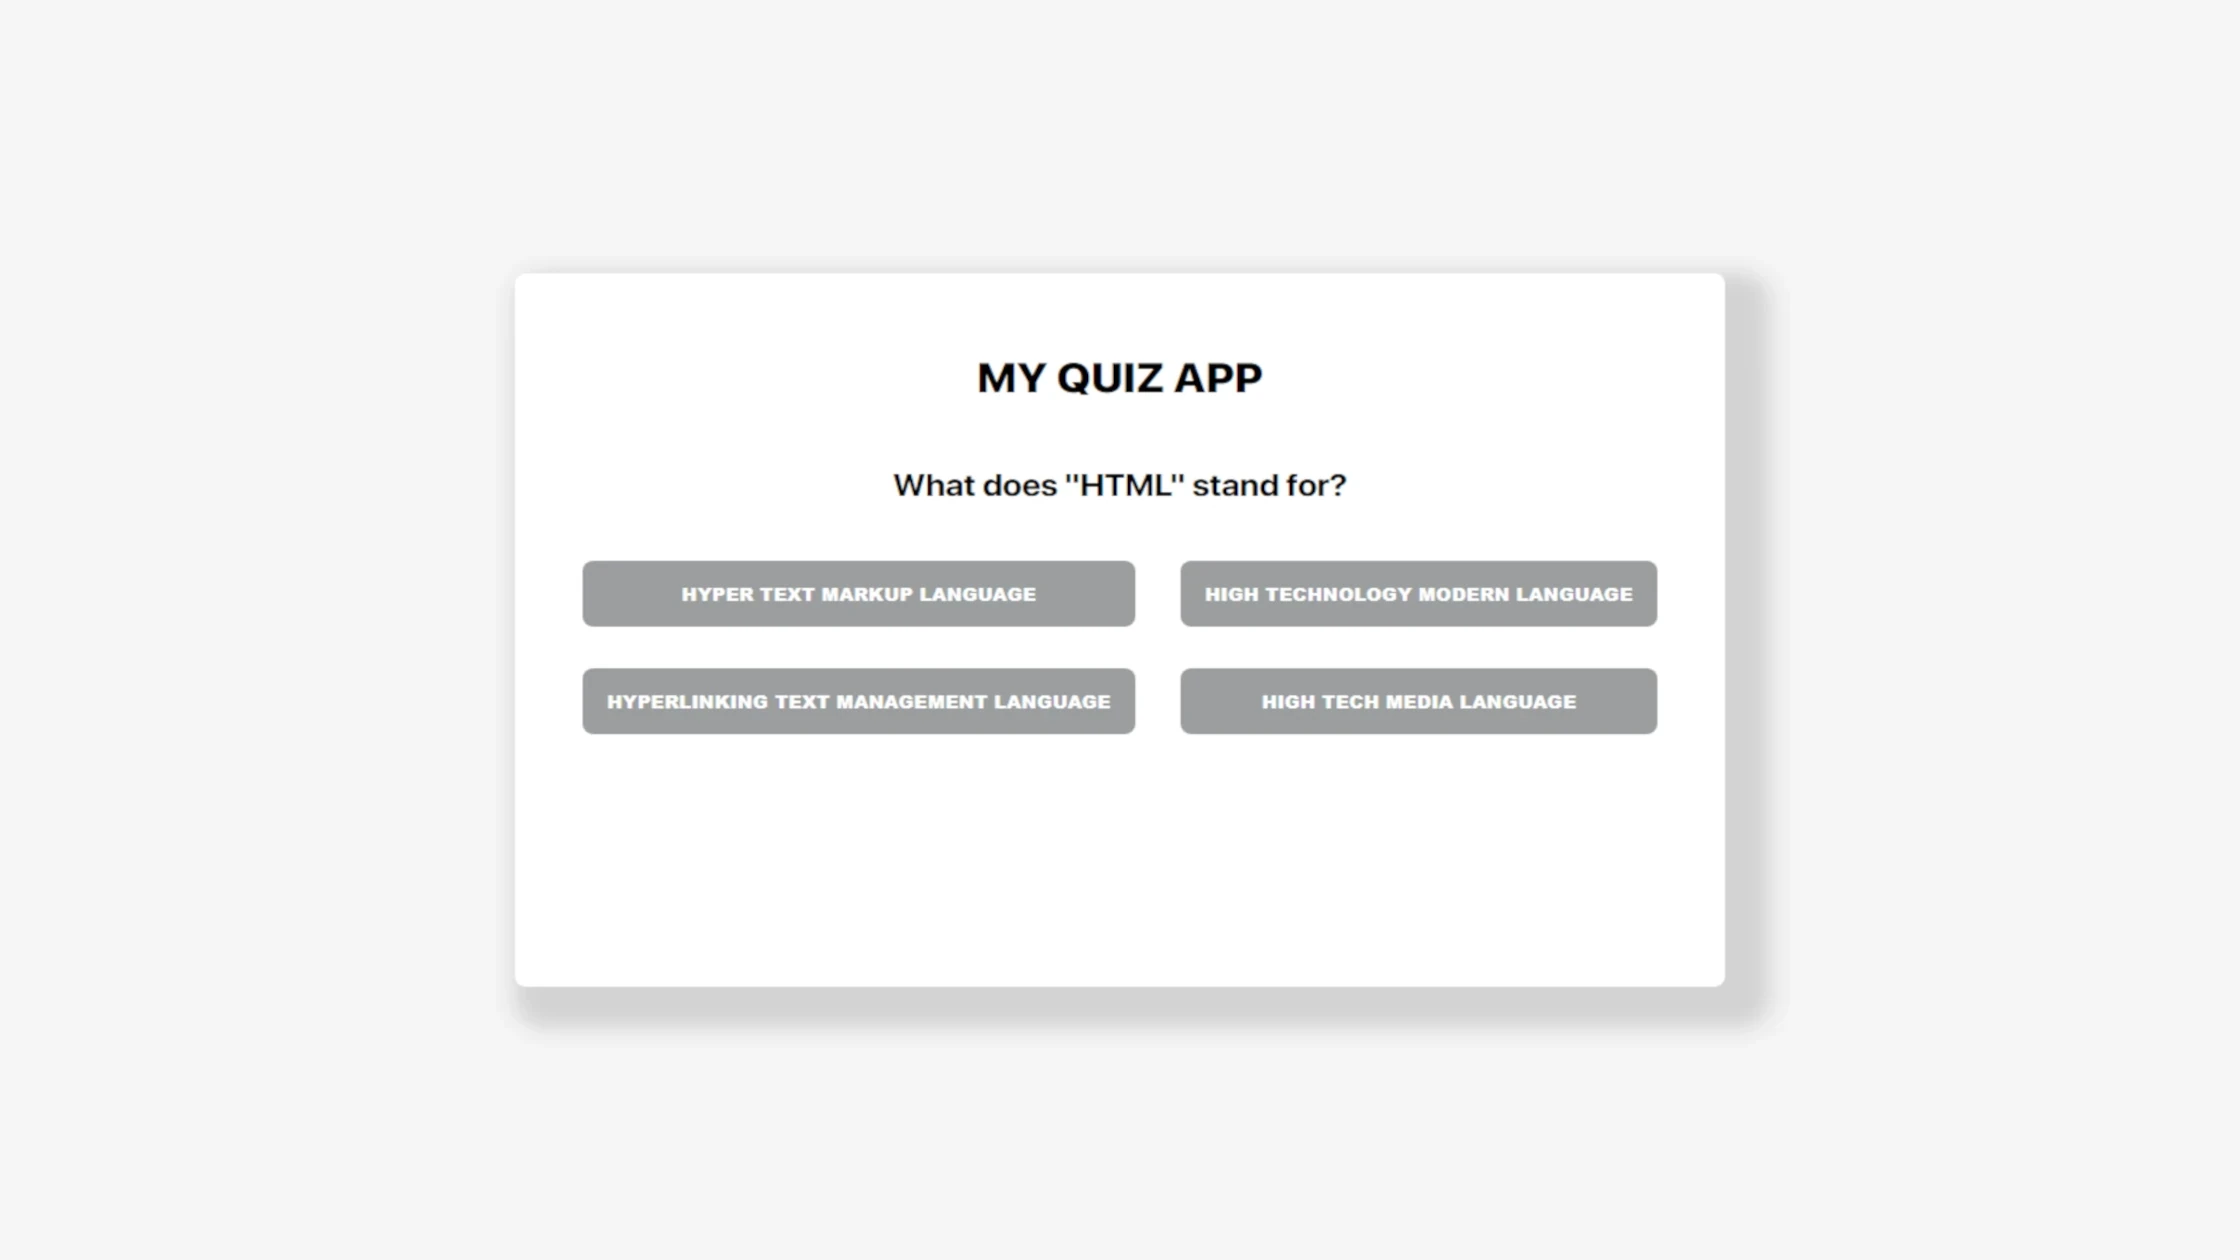
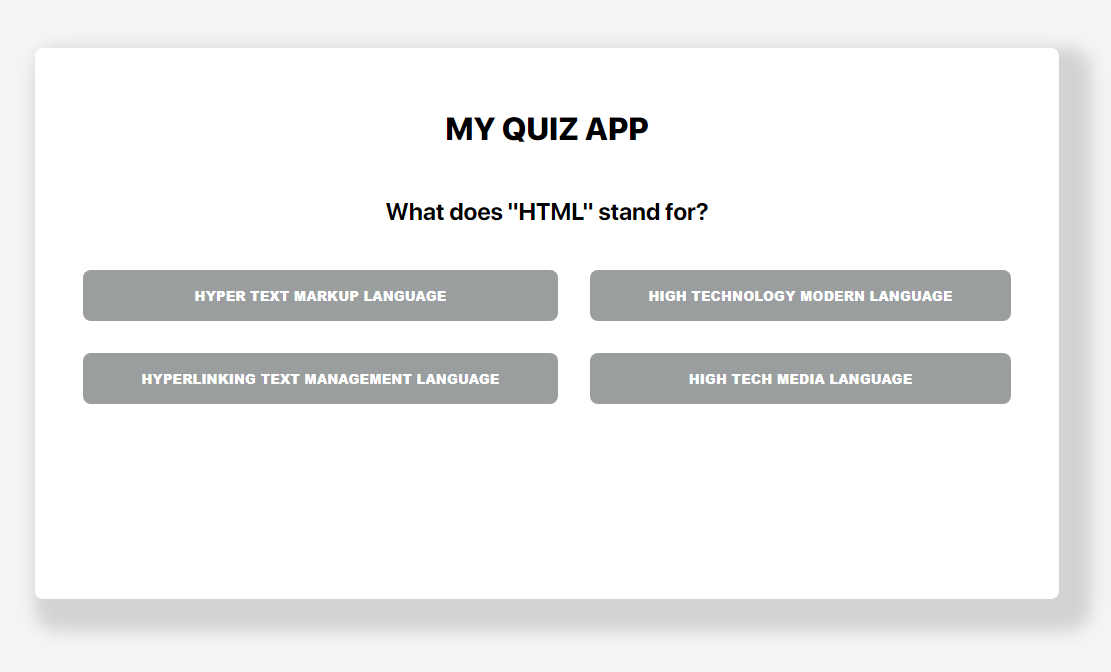
Now you should see your question and answers on the page:
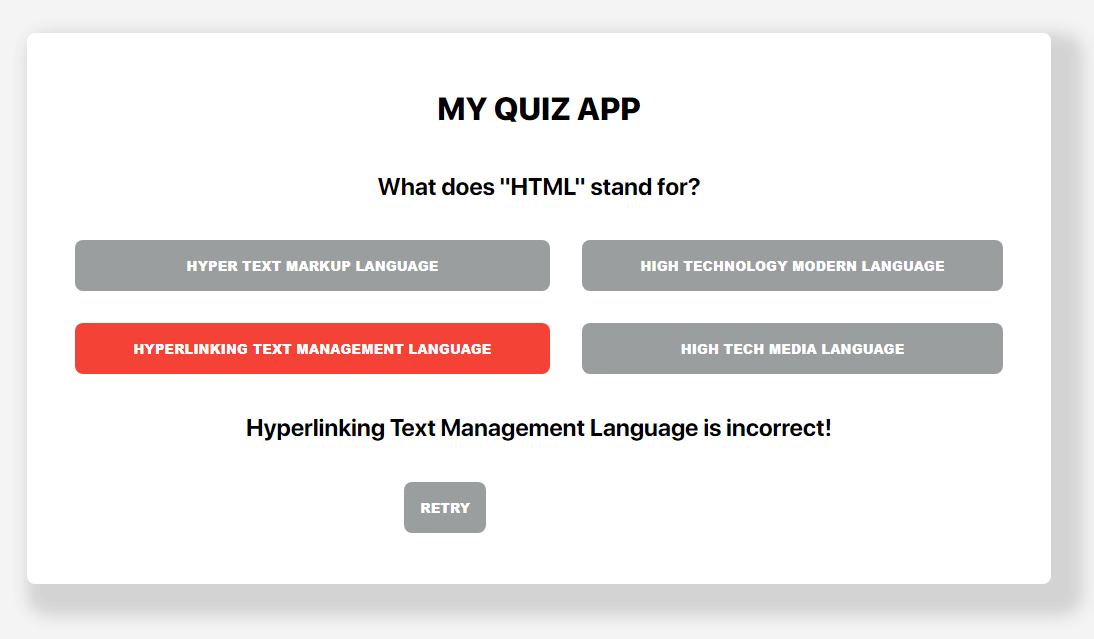
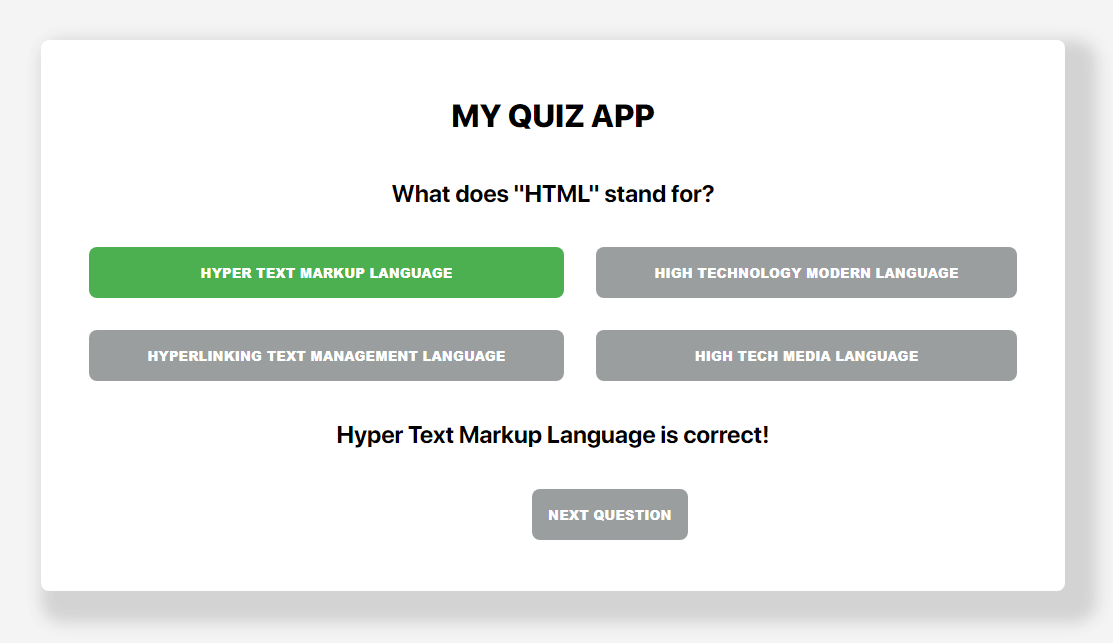
In my example, we will use buttons to get the users input and compare it to the correct answer. The button will turn red if its wrong and will display the retry button, but if the answer is right, then the button turns green and displays the next question button.
Here's our script for checking our answers when users click the button:
function checkAnswer(id) {
  const input = document.getElementById(id).innerHTML;
  const button = document.getElementById(id);
  const answer = questions[currentQuestion].options[questions[currentQuestion].correctAnswer];
  const result = document.getElementById("result");

  if (input !== answer) {
    // Display incorrect
    button.style.backgroundColor = "#F44336"
    result.style.visibility = "visible"
    result.innerHTML = `${input} is incorrect!`;

    // Enable retry button
    const retryBtn = document.getElementById("retry");
    retryBtn.style.visibility = "visible"
  } else {
    button.style.backgroundColor = "#4CAF50"
    result.style.visibility = "visible"
    result.innerHTML = `${input} is correct!`;

    // Enable next button
    const nextBtn = document.getElementById("next");
    nextBtn.style.visibility = "visible";
  }

  // Disable the answer buttons
  disableButtons();
}

function disableButtons() {
  for(let i = 1; i <= 4; i++) {
    const btn = document.getElementById("answer" + i);
    btn.disabled = true;
  }
}
Now let's add functionality to our Retry and Next Question buttons.
function nextQuestion() {
  // Randomize the currentQuestion index
  currentQuestion = Math.floor(Math.random() * questions.length);

  // Check if there are more questions
  if (currentQuestion < questions.length) {
    // Reset button styles and re-enable them
    for(let i = 1; i <= 4; i++) {
      const btn = document.getElementById("answer" + i);
      btn.disabled = false;
      btn.style = ""; // Reset any applied styles
    }

    // Hide the retry button
    const nextBtn = document.getElementById("next");
    nextBtn.style.visibility = "hidden";

    // Clear the result message
    const result = document.getElementById("result");
    result.style.visibility = "hidden";
    result.innerHTML = "";

    loadQuestions();
  } else {
    // If no more questions, display a completion message and hide the "Next Question" button
    const result = document.getElementById("result");
    result.innerHTML = "Quiz completed! Thank you for playing!";
    const nextBtn = document.getElementById("next");
    nextBtn.style.visibility = "hidden";
  }
}

function retryQuiz() {
  // Reset button styles and re-enable them
  for(let i = 1; i <= 4; i++) {
    const btn = document.getElementById("answer" + i);
    btn.disabled = false;
    btn.style = ""; // Reset any applied styles
  }

  // Hide the retry button
  const retryBtn = document.getElementById("retry");
  retryBtn.style.visibility = "hidden";

  // Clear the result message
  const result = document.getElementById("result");
  result.style.visibility = "hidden";
  result.innerHTML = "";
}
Let's not forget to add these functions to our buttons in our HTML using the onclick attribute.
<!DOCTYPE html>
<html lang="en">
<head>
  <meta charset="UTF-8">
  <meta name="viewport" content="width=device-width, initial-scale=1.0">
  <link rel="stylesheet" href="./index.css">
  <title>My Quiz App</title>
</head>
<body>
  <main>
    <div class="container">
      <h1 id="title">My Quiz App</h1>
      <h2 id="question">Question?</h2>
      <div id="answer-container">
        <button id="answer1" onclick="checkAnswer(this.id)">Answer 1</button>
        <button id="answer2" onclick="checkAnswer(this.id)">Answer 2</button>
        <button id="answer3" onclick="checkAnswer(this.id)">Answer 3</button>
        <button id="answer4" onclick="checkAnswer(this.id)">Answer 4</button>
      </div>
      <h2 id="result"></h2>
      <div class="button-container">
        <button id="retry" onclick="retryQuiz()">Retry</button>
        <button id="next" onclick="nextQuestion()">Next Question</button>
      </div>
    </div>
  </main>
  <script src="./index.js"></script>
</body>
</html>
Now go ahead a test to the buttons to see if they work!
Its good modern practice to build web apps for mobile devices since most people are looking at web pages from their phones. So to do that we can take advantage of CSS' media queries. Don't worry too much if you don't know how they work, but take some time one day to read up about it.
For now add this to your index.css script:
/** tablets and smaller */
@media (max-width: 1024px) {
  html, body {
    overflow: hidden;
  }

  .container {
    flex-direction: column;
    width: 100%;
    height: 100vh;
  }

  #answer-container {
    display: flex;
    flex-direction: column;
    flex-shrink: 1rem;
  }
}
Basically, the max-width is the breakpoint of our screen to apply this new CSS. So anything 1024px wide and smaller will have our new CSS properties.
Here's what it would look like on smaller devices:
While our basic quiz is functional, we can take it a step further by integrating APIs. We will keep it simple and create a simple JSON file in our app that will contain all of our questions. So simply grab all the questions from the array and move them into the JSON file.
// questions.json

[
  {
      "question": "What does \"HTML\" stand for?",
      "options": [
          "Hyper Text Markup Language",
          "High Technology Modern Language",
          "Hyperlinking Text Management Language",
          "High Tech Media Language"
      ],
      "correctAnswer": 0
  },
  {
      "question": "Which of these is not a Linux distribution?",
      "options": [
          "Ubuntu",
          "Fedora",
          "Solaris",
          "Debian"
      ],
      "correctAnswer": 2
  },
  {
      "question": "Who is known as the father of the computer?",
      "options": [
          "Alan Turing",
          "Steve Jobs",
          "Charles Babbage",
          "Bill Gates"
      ],
      "correctAnswer": 2
  },
  {
      "question": "In the Marvel Universe, who is the arch-enemy of the Fantastic Four?",
      "options": [
          "Loki",
          "Doctor Doom",
          "Magneto",
          "Thanos"
      ],
      "correctAnswer": 1
  },
  {
      "question": "Which programming language is known as the \"mother of all languages\"?",
      "options": [
          "C++",
          "Java",
          "Fortran",
          "COBOL"
      ],
      "correctAnswer": 2
  },
  {
      "question": "In \"Star Wars\", what is the name of Han Solo's ship?",
      "options": [
          "Star Destroyer",
          "Death Star",
          "Millennium Falcon",
          "X-Wing"
      ],
      "correctAnswer": 2
  },
  {
      "question": "Which of these is not a database management system?",
      "options": [
          "MySQL",
          "Oracle",
          "Photoshop",
          "PostgreSQL"
      ],
      "correctAnswer": 2
  },
  {
      "question": "Who wrote \"A Song of Ice and Fire\", which was adapted into the TV series \"Game of Thrones\"?",
      "options": [
          "J.K. Rowling",
          "Stephen King",
          "J.R.R. Tolkien",
          "George R.R. Martin"
      ],
      "correctAnswer": 3
  },
  {
      "question": "What does the \"P\" in \"PHP\" stand for?",
      "options": [
          "Program",
          "Preprocessor",
          "Protocol",
          "Python"
      ],
      "correctAnswer": 1
  },
  {
      "question": "In the world of video games, which character is known for saying \"It's-a me, Mario!\"?",
      "options": [
          "Sonic",
          "Luigi",
          "Mario",
          "Link"
      ],
      "correctAnswer": 2
  }
]
We will utilize JavaScript's fetch API here to get these questions to add to our quiz. It will take just a little bit of refactoring.
// index.js

async function fetchData() {
  try {
    const response = await fetch("questions.json");

    if (!response.ok) throw new Error("ERROR: Network response was not ok.");

    questions = await response.json();

    loadQuestions();
  } catch (error) {
    console.error(error);
  }
}

// rest of your code

fetchData();
Instead of calling loadQuestions at the end of our script, we will call fetchData to get the data and inside that function we call loadQuestions to make sure all the questions load properly.
And there you have it! You created your first web app with basic HTML, CSS, and JavaScript. The developer journey doesn't end here though because now we're at the part that all developers dread... testing.
Always test and make sure your code works. Come up with test cases that users will likely come across, but don't fuss over it too much. Once you've completed testing you're ready to deploy your code.
Congratulations! You took your first steps to becoming a web developer. You can honestly spend a lot of time at this point learning just these 3 technologies, but if you want to progress to the next step in most frontend developers path, then take a look at learning a framework like Vue.js.
